Bike handlebar grips may seem like a small component in the cycling world, but they play a vital role in enhancing control, comfort, and overall riding experience. Grips are the direct contact points between a cyclist and their bicycle, providing stability and confidence while maneuvering through diverse terrains.
Whether you’re a seasoned cyclist or a beginner, understanding the importance of choosing the right bike handlebar grips can significantly impact your cycling performance and enjoyment.
In this guide, we will explore the world of bike handlebar grips, their various types, materials, and designs, and highlight the key factors to consider when selecting the perfect grips for your riding style.
So, get ready to unlock a new level of control and comfort as we go deeper into understanding bike handlebar grips.
What are Bike Handlebar Grips
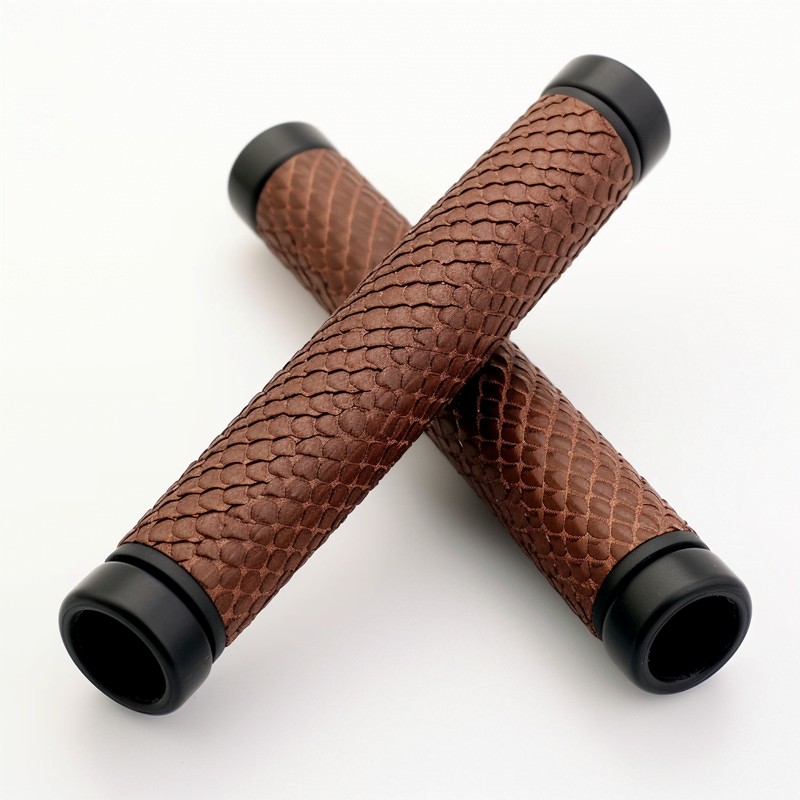
Bike handlebar grips are the cylindrical coverings or sleeves that are installed on the handlebars of a bicycle. They are designed to provide a comfortable and secure grip for the rider’s hands while cycling.
They come in different lengths, diameters, and patterns to accommodate different hand sizes, preferences, and riding styles. The primary function of bike handlebar grips is to improve control and comfort while riding.
They help absorb shocks and vibrations from the road, reducing hand fatigue and providing a more comfortable riding experience. Bike handle grips also offer better traction and prevent the rider’s hands from slipping, especially in wet or sweaty conditions.
Understanding Bike Hand Grips Thickness
Grip thickness varies among the different options available. Cyclists with larger hands often find thicker grips more comfortable, while those with smaller hands tend to prefer thinner grips.
Ultimately, the choice of grip thickness depends on personal preference and hand anatomy. To determine the most suitable grip thickness for you, it is recommended to experiment with a few different sizes.
In general, thicker handle grips for bikes are commonly favored in all types of mountain biking. Their increased thickness provides enhanced vibration-dampening capabilities, as the additional material absorbs shocks more effectively.
However, some riders believe that thicker grips may somewhat diminish the sensation of the trail. Thinner grips, on the other hand, allow more direct feedback from the tires and ground, enabling riders to perceive the terrain with greater sensitivity.
Exploring Bike Hand Grips Texture or Pattern
Various grip surfaces feature different patterns to cater to individual preferences. Smooth grips, waffle patterns, ridges between the fingers, and palm bulges are some of the common design variations.
The chosen pattern significantly affects both the comfort and traction provided by the grip. It serves as a tread-like feature, ensuring your hand maintains a secure hold even when the grip becomes wet or sweaty.
In wet weather conditions, grips with a more aggressive tread tend to offer better performance. Additionally, some grips are specifically designed to be used with gloves, while others are tailored for bare hands.
To discover the ideal texture for your needs, it is advisable to try out several bike handlebar grips and determine which pattern suits you best.
Our Top 3 Picks for the Bike Handlebar Grips in 2024
With the plethora of handlebar grips on the market, deciding on the perfect pair can feel like a daunting task. Fear not, fellow cyclist! We’ve meticulously analyzed and compared countless options to present you with the top 3 picks, empowering you to navigate the selection process with ease.
Last update on 2025-08-26 / Affiliate links / Images from Amazon Product Advertising API
All About Bike Handlebar Grip Materials
The choice of the material significantly impacts the durability, comfort, cost, aesthetics, and overall feel of bike handlebar grips. Different materials offer distinct characteristics, with some pleasant feelings on the hands but prone to easy wear or tear, while others are long-lasting but may cause blisters when used without gloves.
Certain materials may possess appealing looks but lack sufficient grip. It’s important to consider the trade-offs when selecting a grip material.
When making a decision, factors to consider are whether you ride with gloves or bare hands, the climate in which you ride, and your budget. Among the most popular materials used for bike handlebar grips are:
1. Rubber Grips
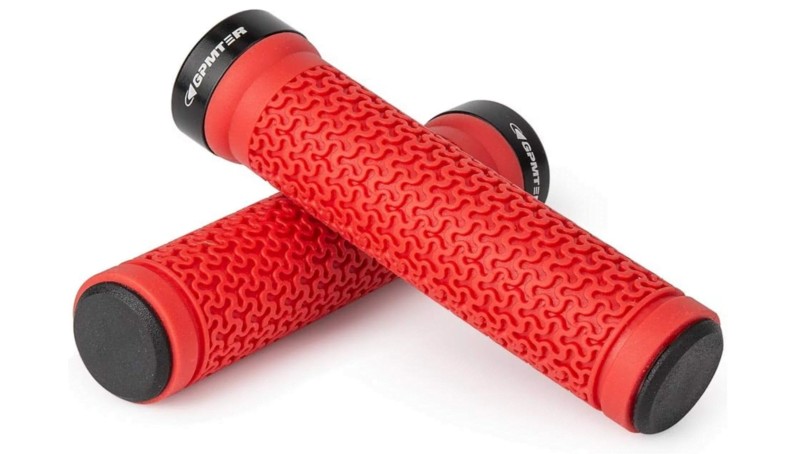
Rubber grips are the most commonly used material due to their affordability. They are also durable and have a long lifespan, requiring minimal maintenance. Rubber does not degrade when exposed to UV light and provides good shock absorption and vibration dampening.
Additionally, it offers insulation, keeping hands warmer during winter rides. However, a drawback of rubber grips is their lack of breathability, which can lead to the development of blisters when sweat is unable to vent or absorb.
2. Silicone Grips
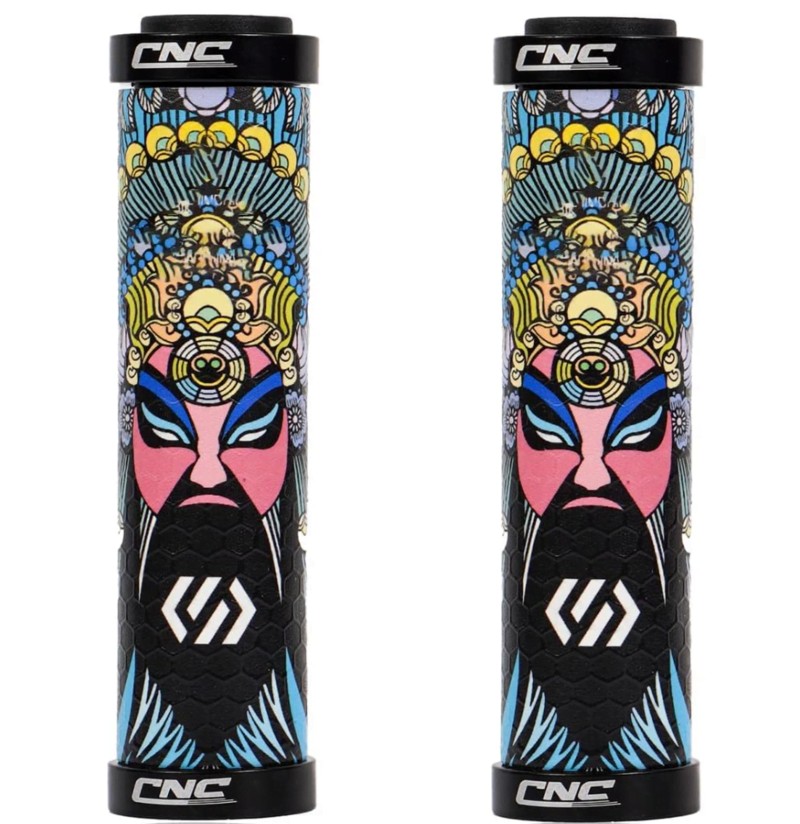
Silicone grips are lightweight and offer excellent grip in all weather conditions. They possess superior vibration absorption properties and are resistant to UV degradation, maintaining their flexibility even with sun exposure.
However, silicone grips are relatively fragile and may tear if subjected to accidents or abrasive surfaces. The use of bar ends or end caps can help prevent damage. Silicone grips have gained popularity, particularly among mountain bikers, for their exceptional comfort.
3. Cork Grips
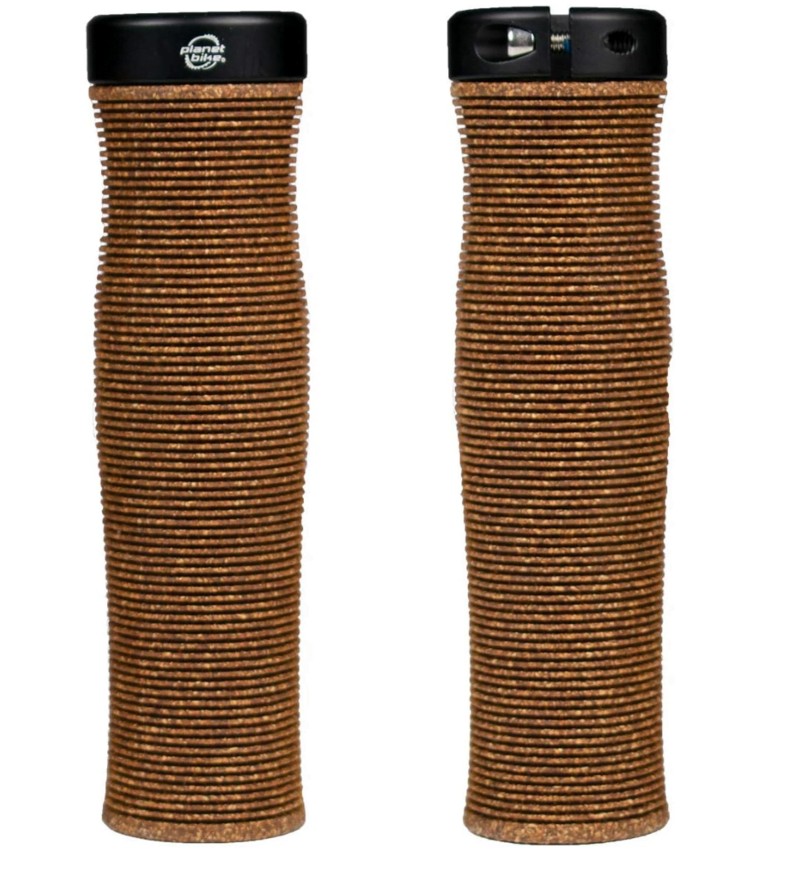
Cork grips are known for their high performance, primarily due to their quick-drying nature. Sweat does not linger on cork grips, reducing the likelihood of slippery hands and minimizing blister formation.
Cork is also durable, long-lasting, and environmentally friendly as it is a natural material. However, cork bike handlebar grips tend to be more expensive compared to other options.
4. Gel Grips
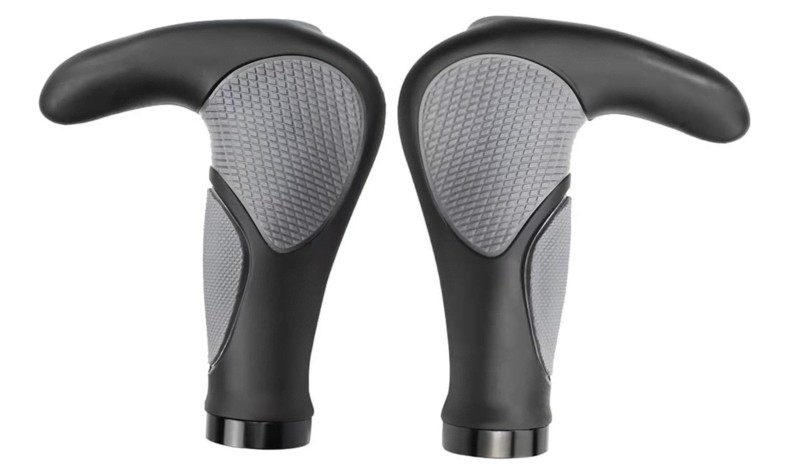
Gel grips are renowned for their exceptional comfort, often combining gel with rubber to enhance durability. They are also relatively affordable. However, one drawback is that gel does not effectively vent or absorb sweat, making blisters common if gloves are not used during rides.
5. Leather Grips
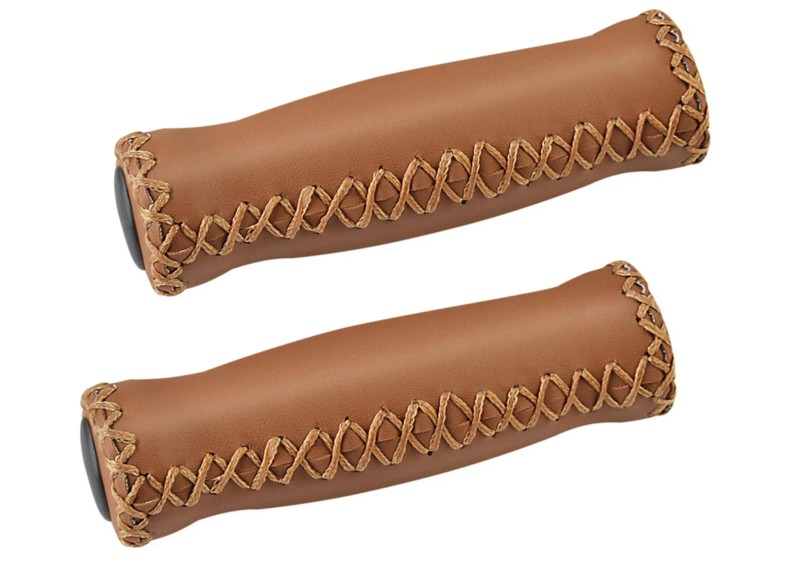
Leather grips are primarily sought after for their aesthetic appeal, particularly on cruiser and vintage bicycles. While they offer a classic and natural look, leather grips tend to be more expensive compared to other grip materials. It’s important to note that leather can become slippery when wet, potentially affecting your handling.
6. Foam Grips
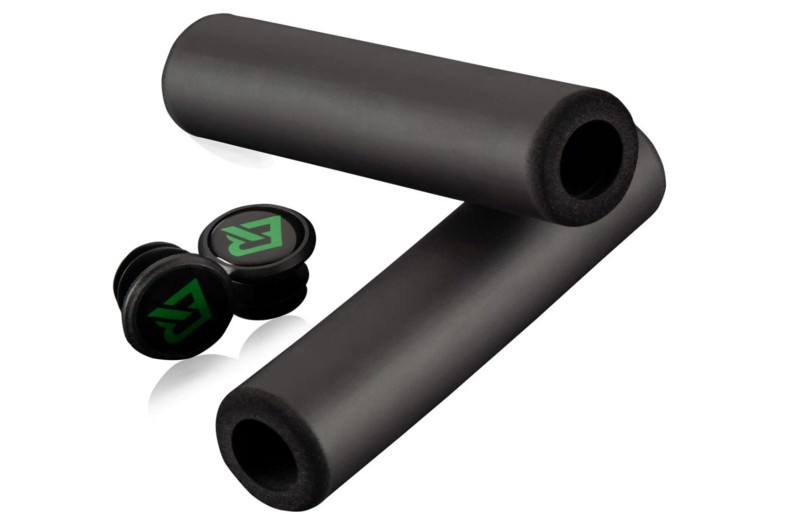
Foam grips are lightweight and cost-effective. They have the advantage of sweat absorption, which helps reduce the occurrence of blisters. However, foam tends to degrade relatively quickly when exposed to UV light and can easily tear if the bike is dropped or leaned against abrasive surfaces.
As a result, foam grips may require more frequent replacement. Foam grips were once popular among mountain bikers until silicone grips gained prominence approximately a decade ago.
7. Aluminum
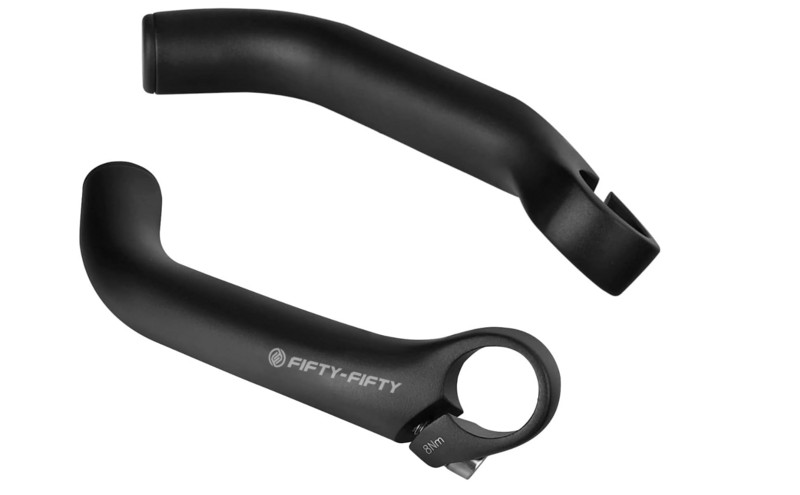
Aluminum is often used for bar ends or locking collars, and some companies produce anodized aluminum grips. These bike handlebar grips may be wrapped in leather or rubber and can feature textured surfaces for improved grip.
Aluminum is lightweight, durable, and resistant to corrosion. However, without any coating, cover, or textured surface for additional grip, aluminum grips can become slippery when wet. Additionally, the material can feel cold during winter rides.
8. Wood or Bamboo
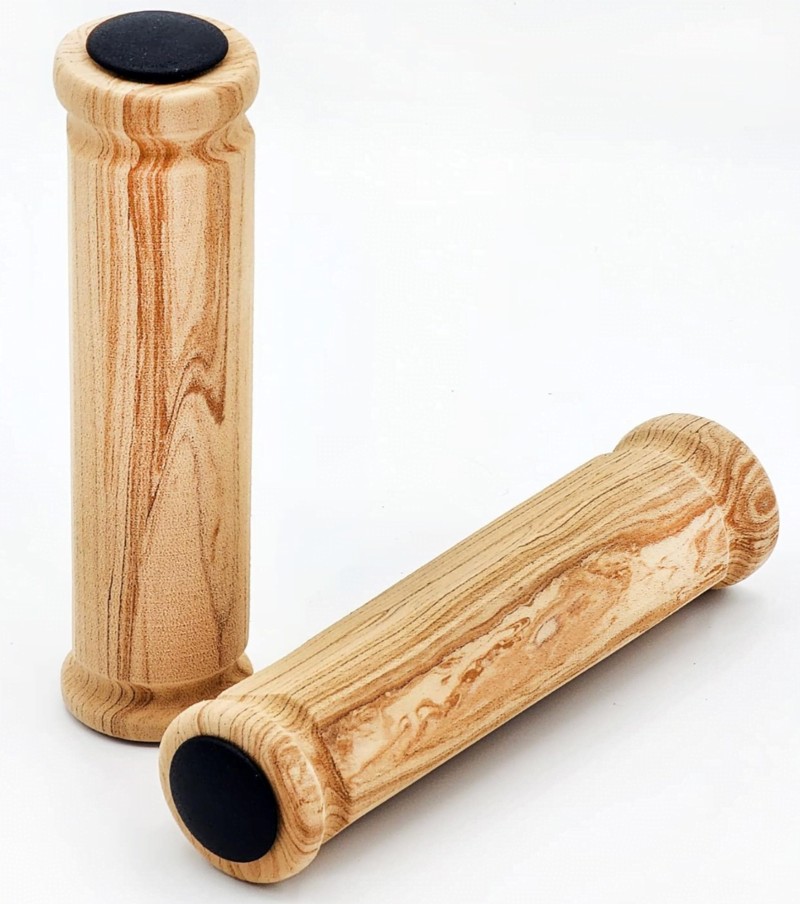
Certain companies offer bike handlebar grips made from natural materials like wood or bamboo. These grips are primarily chosen for their visual appeal, providing an interesting and natural look to the bike. However, they offer limited vibration dampening and durability compared to other grip options.
A Quick Look at Different Types of Bike Handlebar Grips
1. Ergonomic Grips
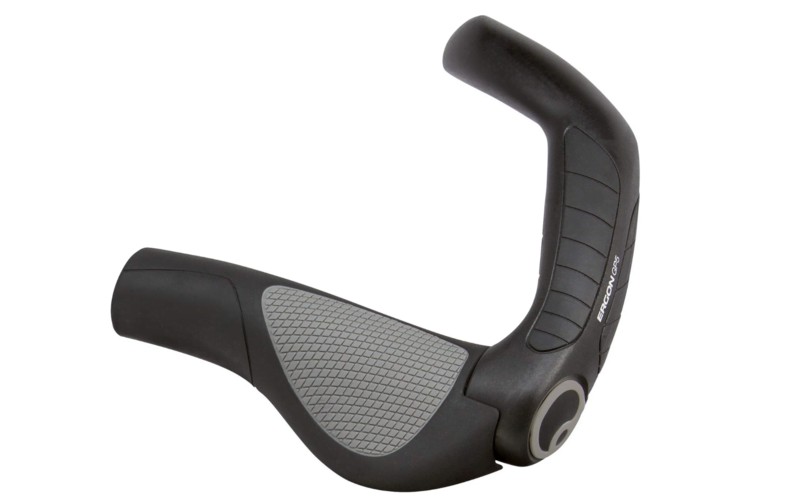
Non-round grips are designed with an extended “wing” or a flat rounded section that protrudes to offer added support for your hand and wrist. The primary objective of this design is to encourage a natural and healthy wrist position while cycling.
By promoting a comfortable hand position, these ergonomic grips effectively reduce wrist pain and prevent hand numbness. When using non-ergonomic grips, as your hands become fatigued, you tend to twist your wrist backward, leading to discomfort.
The ergonomic design encourages proper wrist alignment and also aids in maintaining good posture, which can help alleviate back and neck pain.
During the installation of ergonomic grips, it is important to position them in a way that the wing rests slightly lower than the natural resting point of your wrists while riding. This positioning ensures that when your wrists naturally relax and tire, the wing of the grip provides support, keeping them in an optimal ergonomic position.
2. Plain Gauge Grips (Also Called Traditional or Standard Grips)
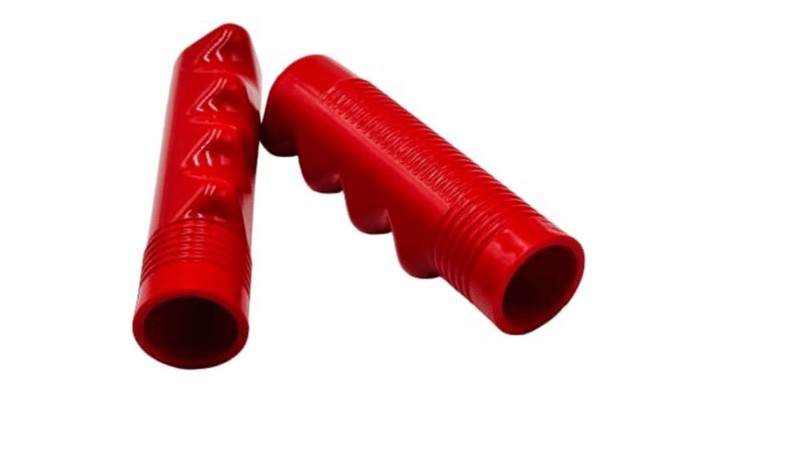
These bike handlebar grips maintain a consistent thickness throughout their entire length and have a cylindrical shape. They are typically made of rubber, silicone, or foam and can easily be slipped onto the handlebars. Some models of plain gauge grips feature ridges or bulges that are positioned between your fingers for added grip texture and comfort.
3. Grips with Integrated Bar Ends

Some bike handlebar grips incorporate bar ends into their design, which are short bars extending forward from the grip ends. Bar ends serve the purpose of providing an additional hand position on flat handlebars.
This feature enhances comfort and reduces fatigue during long rides, making bar ends particularly beneficial for touring. Many ergonomic grips come equipped with bar ends, and we will delve deeper into their functionality later in this guide.
4. Dual Compound Grips
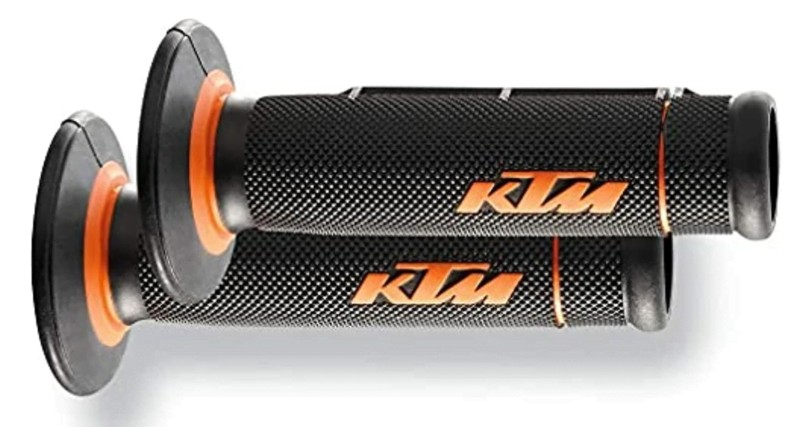
Dual compound grips are crafted using two different materials, commonly varying types of rubber. The base layer of the grip is made from a harder material, ensuring a secure grip on the handlebar and preventing slippage or twisting.
The top layer, where your hands hold the grip, consists of a softer material, providing enhanced comfort. While this design proves effective, it’s worth noting that dual compound grips generally tend to have a thicker profile.
Riders who prefer thinner bike handlebar grips might opt for alternative options. The choice between dual compound grips and others ultimately boils down to personal preference and hand size.
5. Flanged / Flangeless Grips
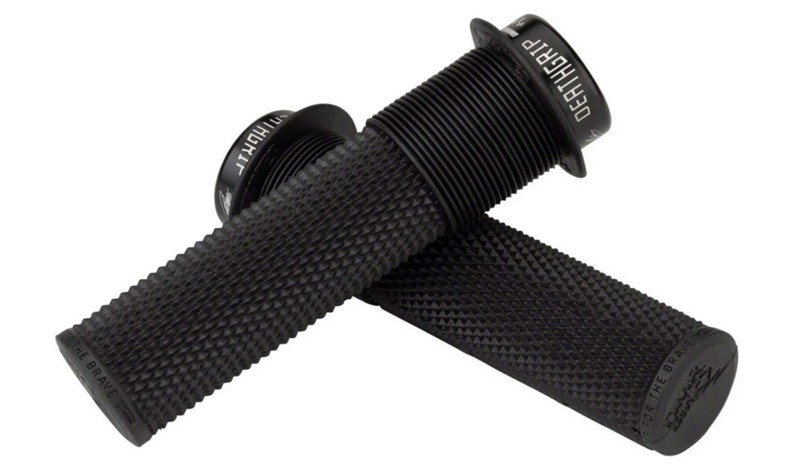
Flanges, which are rubber disks positioned either near the grip opening or inside the grip, are primarily a matter of personal preference and aesthetics. They lend a classic appearance to the bike’s handlebars.
The main purpose of flanges is to ensure that your hand remains securely on the grip, preventing any slippage. Flanges are commonly found on BMX bikes and certain mountain bikes. However, it is important to note that the majority of bike handlebar grips available are flangeless, lacking these rubber disks.
6. Lock-On Grips
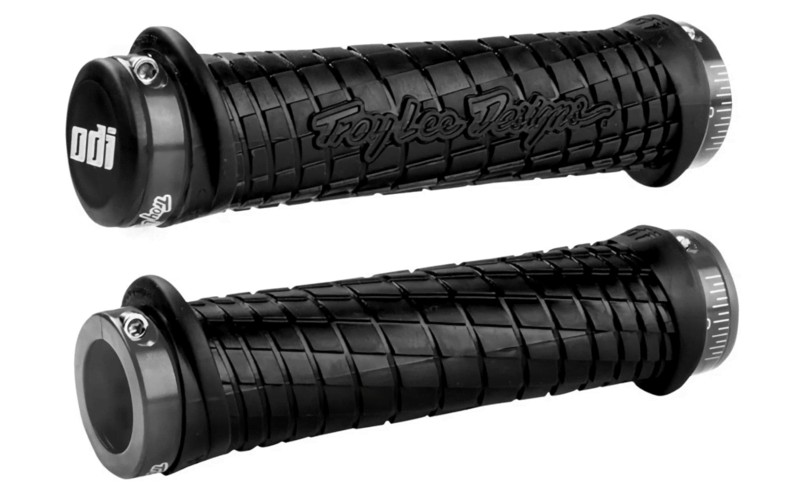
Lock-on grips feature metal collars on the ends that securely attach to the handlebar using Allen bolts, effectively bolting them in place. This design offers a significant advantage as it prevents the grips from sliding or rotating on the handlebars.
Lock-on grips are becoming increasingly popular in various cycling disciplines that utilize grips, such as mountain biking, bicycle touring, and commuting. Later in this guide, we will delve into lock-on grips in more detail.
Bike Handlebar Grips for Different Types of Bikes
Here are some common types of bike grips used for different bike types:
1. Mountain Bikes
These bike handlebar grips feature an outer clamp that locks them securely onto the handlebars, providing a slip-free grip even in rough off-road conditions.
Designed to provide better support and comfort for your hands, these grips often have a contoured shape that reduces fatigue and numbness on long rides.
2. Road Bikes
Road bikes typically use drop handlebars, and riders often wrap them with handlebar tape. This tape provides cushioning, and grip, and absorbs road vibrations.
Some road bikes, especially those used for touring or endurance riding, may use foam grips that offer a comfortable and lightweight option.
3. Hybrid/City Bikes
Similar to those used on mountain bikes, ergonomic grips provide comfort and reduce strain on the hands and wrists during urban commuting or leisurely rides.
Many hybrid/city bikes come with standard rubber grips that offer a basic level of grip and durability.
4. BMX Bikes
These grips are usually shorter and have a narrower diameter to accommodate the smaller handlebars of BMX bikes. They often feature patterns or textures for improved grip during tricks and stunts.
5. Cruiser Bikes
Cruiser bike handlebar grips are wider and more padded, providing a comfortable and relaxed grip for casual cruising. They often have a retro design and can be made from materials like leather or synthetic materials.
6. Folding Bikes
Folding bikes may have specific grips designed to accommodate the folding mechanism and compact size. These bike handlebar grips are often slim and lightweight.
Comparing Bike Grip Attachment Systems: Slip-On Vs Lock-On Grips
There are two primary methods by which bike handlebar grips attach to your handlebars:
1. Lock-On Grips

Lock-on grips utilize a small Allen bolt for secure attachment. They feature metal collars or clamps at one or both ends of the grips, through which a bolt is inserted. When the bolt is tightened, the collars compress and firmly grip the handlebars, preventing any movement.
The key advantage of lock-on grips is their ease of installation and removal. This allows for convenient swapping of grips, especially for those who like to experiment with different styles. Lock-on grips have a slightly larger diameter than the handlebars, facilitating easy sliding on and off when the bolts are not tightened.
Lock-on grips provide superior stability compared to slip-on grips. Once tightened, they remain firmly in place due to the clamping mechanism. This is particularly beneficial when riding technical terrain, as it eliminates concerns about grip slippage at crucial moments.
Lock-on grips typically come with end caps that protect the handlebars from damage in case of accidents. They prevent the grips from getting ripped off and offer personal protection by preventing potential injury from exposed handlebar ends during crashes.
The main drawback of lock-on grips is their increased weight and higher cost compared to slip-on grips. However, the weight difference is generally minimal for most riders, as the metal collars only add slightly more weight. In terms of cost, lock-on grips are typically around 20% more expensive than similar slip-on grip options.
2. Slip-On Grips
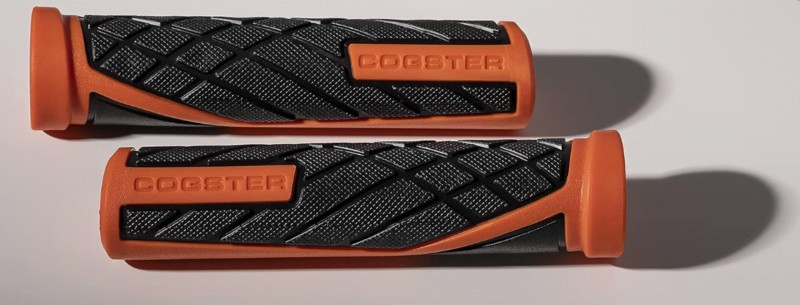
Slip-on grips, as their name suggests, are designed to be easily slid onto the handlebar ends and rely on friction to stay in place. The inside diameter of the grip is slightly smaller than the handlebar diameter, creating a tight fit that prevents the grip from sliding during rides.
Due to their snug fit, installing slip-on grips can be a bit challenging. The use of a lubricant is often necessary to facilitate the installation process. Rubbing alcohol is an effective option as it evaporates quickly without leaving any residue. Dish soap can also be used, although it may leave a residue between the grip and handlebars.
When removing slip-on grips, lubricant or compressed air can help in loosening them. Alternatively, cutting them off is also a viable option when they become worn out.
The primary advantages of slip-on grips are their affordability, lightweight nature, and simplicity. They consist of a single piece of material without any metal clamps or screws, making them a widely adopted grip design.
However, slip-on grips do have a few drawbacks. Under certain conditions, they may slide around. As the grips wear out, they can stretch and become looser. Factors such as heat, UV light exposure, water, or dirt can contribute to grip slippage. If slippage occurs, it indicates the need for replacement.
Another drawback is the inconvenience associated with installing and removing slip-on grips due to their tight fit. Once installed, it is advisable to keep them in place until replacement is desired. Slip-on grips are not ideal for individuals who enjoy experimenting with different types of bike handlebar grips.
Discovering an Alternative Grip Option: Handlebar Tape
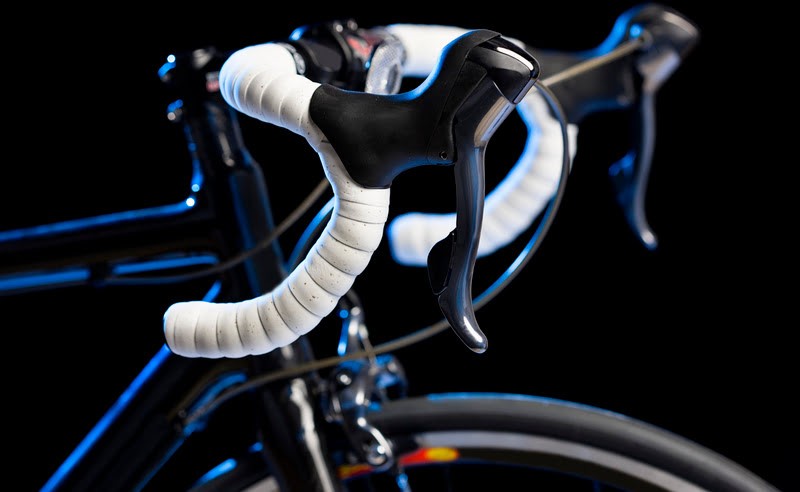
Bar tape serves a similar purpose to bar grips by providing grip and absorbing shocks and sweat. However, it is primarily used on road handlebars that offer multiple hand positions, such as drop bars, trekking bars, mustache bars, and bullhorn bars.
In certain scenarios, bicycle tourists and mountain bikers may apply bar tape to their bar ends to enhance comfort. Some riders even combine handlebar grips on the bar ends with bar tape on the remaining sections of the bars. This approach is commonly observed in trekking bars and H bars.
Bar tape is typically supplied in a rolled format, similar to regular tape. Applying it involves wrapping the tape around the desired section of the handlebars. It remains securely in place either through an adhesive backing or by relying on friction in the case of non-adhesive tape.
Different Types of Bar Tape for Handlebars
1. Cork Handlebar Tape
This material is highly regarded for its comfort. Cork effectively absorbs shocks and dries quickly. However, it may not be the most durable option, as it can develop splits and cracks with age. To enhance durability, most cork tape nowadays is blended or backed with a synthetic material.
2. Synthetic Bar Tape
Synthetic tape, made from materials like silicone, polyurethane, or nylon, is the most commonly used bar tape. It offers a balance of durability and lightweight construction. Some variants feature an additional gel or foam layer for enhanced vibration dampening.
3. Leather Bar Tape
Leather is a timeless material for bar tape, imparting a classic and vintage appearance to the bike. Perforations are often present to improve grip and facilitate quicker drying. Leather tape requires some time to break in and soften before providing optimal comfort.
4. Foam Bar Tape
Instead of tape, it is a lengthy tube made of foam. Similar to foam grips, it covers a larger area of the bar. The material is comfortable but deteriorates quickly when exposed to UV light. It is also prone to tearing.
5. Low Profile Bar Tape
Some cyclists prefer a thinner tape, measuring 1.5-1.8 mm in thickness. Low-profile tape can enhance the sensation of the road surface. However, it allows more vibrations to be felt in the rider’s hands.
6. Thick Bar Tape
This type of tape is thicker, measuring 3+mm in thickness. It offers increased comfort due to its ability to absorb vibrations and road noise better. Off-road riders and individuals with larger hands may find thick bar tape more suitable.
Adhesive vs Non-Adhesive Bar Tape
Bar tape comes in adhesive and non-adhesive varieties. The choice between them ultimately depends on personal preference. When purchasing tape, it is important to verify whether it is adhesive or not to avoid any surprises.
Non-adhesive bar tape remains securely in place through friction when properly wrapped. The ends are secured with adhesive tapes, such as electrical tape, to prevent unraveling. The advantages of non-adhesive bar tape are easier installation and no residue left behind upon removal.
Adhesive bar tape adheres to the handlebars using a layer of adhesive on the back of the tape. The downside of adhesive bar tape is its difficulty in maneuvering around bends on the handlebars. It tends to bunch up, making installation challenging and frustrating. Additionally, the adhesive residue can create a mess when removed from the handlebars.
I recommend the Cinelli Cork Gel Ribbon Handlebar Tape. It is a non-adhesive cork bar tape that incorporates a thin layer of gel, enhancing its shock absorption properties. This tape provides a comfortable grip and is easy to install.
Demystifying Bar Ends
Irrespective of the style of grip chosen, numerous cyclists prefer to attach bar ends. These handlebar extensions, resembling horns, protrude forward from the ends of flat handlebars. Some riders prefer angling them slightly upwards.
The majority of bar ends can be easily fastened to the handlebars adjacent to the grips using bolts. During installation, you may need to adjust the position of your existing grips to create sufficient space. In certain cases, bar ends are integrated into the design of handlebar grips. Typically, they are constructed from aluminum.
Unveiling the Advantages of Bar Ends for Handlebars
1. Provide a Comfortable Position
One significant disadvantage of riding with flat or riser bars is that your hands are confined to a single position throughout the ride. There is only one place to grip, which can lead to muscle fatigue, hand cramps, and compromised grip over time. Prolonged exposure may even result in nerve damage, leading to irreversible numbness.
By incorporating bar ends, you can access a second-hand position, allowing you to shift your hands and engage different muscle groups, providing relief to your nerves. This significantly enhances comfort during long rides and promotes healthier hand conditions by varying your grip periodically.
2. Give you More Leverage for Climbing
When faced with uphill climbs or riding while standing, increased leverage is crucial for exerting a downward force on the pedals. Bar ends enable you to rotate your hands by 90° and widen your grip.
This particular hand position also facilitates leaning your body forward over the handlebars, granting you enhanced leverage to apply substantial power to the pedals.
3. Safeguard Bike Handlebar Grips and Hands
While traversing narrow trails, your hands may come into contact with branches or brush, potentially causing scratches. Bar ends serve as a protective shield, preventing brush and branches from directly hitting your hands.
Furthermore, considering the vulnerability of certain grip materials like foam and silicone, bar ends offer added protection against tearing in case the bike is laid down or leaned against a rough wall.
Naturally, bar ends do possess certain drawbacks. The primary concern is their added weight, which may not be desirable for riders aiming to maintain a lightweight bike. Bar ends contribute a few extra ounces to the overall weight.
Another potential issue is the risk of bar ends getting entangled with obstacles, potentially resulting in a crash. As they essentially extend like small hooks from the ends of your handlebars, imagine snagging a low-hanging tree branch while cruising along a trail. In such an event, your wheel could abruptly turn, leading to a fall from the bike.
A Bit About Cycling Gloves Ultimate Benefits
Many cyclists opt to wear gloves, even if their bike handlebar grips are already comfortable. Cycling gloves offer several advantages, including:
1. Enhanced Comfort
Gloves can enhance comfort by absorbing shocks and vibrations that travel through the handlebar grips. They achieve this through padding in the palm and fingers. Gel gloves are particularly effective in this regard. Additionally, cycling gloves can reduce cramping and numbness in the hands.
2. Warmth Provision
When cycling on cold days, the windchill can cause hands to freeze, leading to decreased dexterity and difficulty in shifting and braking accurately. Insulated cycling gloves provide much-needed warmth to keep fingers comfortable and maintain safe riding conditions.
3. Protection
In the event of an accident or fall, gloves act as a safeguard, protecting hands from road rash. They also shield the back of the hands from scratches caused by bushes and tree branches while riding through narrow trails.
4. Prevention of Blisters
Sweaty hands combined with the friction between the hands and the grips can result in blisters. Certain grip materials, such as rubber, can be harsh on the skin. Gloves create a barrier between the hands and the grips, reducing abrasion and wicking away sweat from the palms. This helps prevent the formation of blisters.
5. Improved Grip
Some handlebar materials, like leather and smooth rubber, tend to become slippery when wet. Cycling gloves incorporate grip material on the palm and fingers, increasing overall grip strength and enhancing control over the bike.
How to Put on Handlebar Grips
Method 1. Replacing Rubber Bike Handlebar Grips
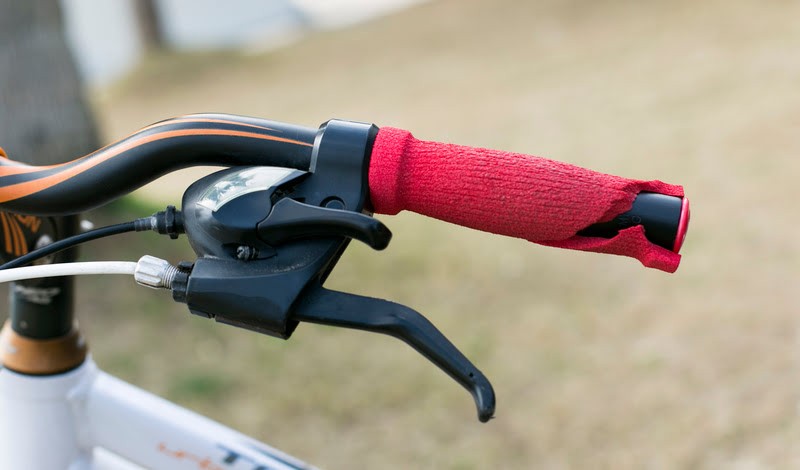
Step 1: How to remove handlebar grips with care:
In some cases, you may need to delicately cut the grip using a razor blade, being mindful not to scratch the chrome. Alternatively, if you wish to preserve the grips without cutting them, apply WD-40 between the grip and handlebar. Allow 5-10 minutes for the WD-40 to penetrate the grip. Twist the grip to distribute the WD-40 inside and easily remove it.
If you encounter difficulty accessing the grip, insert a screwdriver between the bar and the grip to lift and support it while applying WD-40. If the grip is stubbornly stuck, you can use compressed air from a compressor or aerosol to remove it.
Step 2: Clean the handlebar thoroughly:
Thoroughly clean the handlebar by scrubbing it with soap and water to eliminate WD-40 residue, dust, and grime. Use an old rag or sponge to achieve the highest level of cleanliness.
This will facilitate the installation of the new grip and ensure its secure placement. Once cleaning is complete, ensure the entire handlebar is dry. If the handlebar has open ends, be sure to dry the inside as well. Any residual water left inside after installing the new grip can lead to rust.
Step 3: Use long plastic ties as “runners” to install the new grip:
Insert 3-4 long plastic ties into the grip from various sides, creating smooth and low-friction surfaces. Utilize these areas to slide the grip onto the bike. Finally, remove the plastic ties to complete the installation.
Note that lock-on grips, which require a hex wrench (Allen key), are becoming increasingly popular. With lock-on grips, you can easily loosen the bolt, slide the grip on, and then tighten it securely.
Step 4: Apply a quick-evaporating substance inside the grip:
If plastic ties are unavailable, a small amount of an alcohol-based product like hairspray or hand sanitizer can assist in smoothly sliding the grip onto the handlebar. Additionally, this step ensures the grip remains securely in place once installed.
While not strictly necessary, it can prevent the grip from slipping off immediately if any issues arise.
Step 5: How to put grips on a bike:
While pushing the grip onto the handlebar, twisting it slightly can aid in gradual installation. Although the tight fit may present some initial challenges, you will appreciate the grip’s stability during your ride once it is properly in place.
Method 2. How to Put on Handle Grips (Taped Handlebar Grips)
Step 1: Begin by cutting or unwinding the existing handlebar tape:
How to remove handle grips? Well, in most cases, you can simply unwind the old tape from the bike without needing to cut it. However, if cutting becomes necessary, exercise caution to avoid damaging the handlebar itself.
To remove the tape, start by removing the cap at the end of the handlebars. If necessary, you can use a flat-head screwdriver to assist you. Make note of how far the old tape extended, as this will serve as a reference point for ending the application of the new tape.
Step 2: Remove any adhesive residue left by the previous tape:
Use a mild degreaser or a mixture of warm water and dish soap to gently eliminate any remaining adhesive.
Step 3: Set up your workspace and prepare the handlebars for taping:
If the cables are not already pre-attached, lightly secure them to the bars using electrical tape. Decide on the endpoint for the tape and have a knife or scissors ready to trim the excess tape once you’re finished. As an optional step for added stability, wrap some double-sided tape around the lower 2-3 inches of the bar.
Step 4: Begin wrapping each handlebar from the bottom, clockwise for the right and counter-clockwise for the left:
To ensure that the wrap remains secure during your ride, start wrapping from the bottom. This prevents the tape from sliding down beneath your hands.
Additionally, wrapping in the appropriate direction for each hand minimizes the chances of the tape unwrapping while you ride, especially if you clench your hands and twist them outward when fatigued. Pull the tape tightly to achieve a firm and waterproof grip.
Step 5: Leave about half of the tape hanging off the bottom of the bar during the first pass, wrapping it 3-4 times as you work upward:
Move up the bar, overlapping the previous wraps slightly for 3-4 layers. Then insert the cap into the exposed wrap, securing it inside the handlebar and holding the bottom of the tape in place. Repeat this process for both sides.
Step 6: Progress gradually, overlapping around a quarter of the tape with each turn as you ascend the bar:
If there is adhesive on the tape, it is usually covered. Peel off the covering and proceed to tightly wrap the tape upward and around the bar. You may need to pull and adjust the tape multiple times to ensure there are no gaps.
It’s advisable to test the tension of the tape before starting by giving it a firm tug without tearing it. To prevent gaps at the bends of the bar, you might need to overlap the tape slightly more.
Step 7: Lift the rubber covering at the brakes/shifters (lever body) and continue wrapping beyond this point to reach the top of the bars:
To wrap the top flat part of the handlebars, you need to reverse the wrapping direction. As you approach the bottom of the bars, try to get as close to the levers as possible. Then skip over a small area where the bars bend and begin wrapping the top portion of the bars.
Step 8: Change the wrapping direction for the top of the bars:
When reaching the top bar, change the wrapping direction to prevent the tape from unraveling as you rotate your wrists backward. For the right side, wrap in a counterclockwise direction, and for the left side, wrap clockwise.
Step 9: Cut the tape to your desired length and complete the wrapping process:
You can “overwrap” the tape and then mark the points where you want to cut it using a pen. Follow the marked line with scissors to achieve a neat and professional finish.
Step 10: Secure the wrap by adding 2-3 wraps of electrical tape:
Towards the end of the tape, use “finishing tape” to firmly secure the wrap in place. Apply enough finishing tape to prevent easy unwinding, typically using 1-2 inches of tape on the handlebar tape and 1-2 inches on the bike frame.
For a more secure hold, you can use a lit match to carefully melt the tapes together at a few spots, effectively “welding” the handlebar tape onto the handlebars. Exercise caution when working with fire and ensure you do it in a safe environment.
Remember, these steps will help you achieve a well-wrapped and secure handlebar tape for a comfortable and reliable grip during your rides.
Best Bicycle Handlebar Grips Option for Superior Comfort and Control
1. Gusset S2 Extra Soft Compound Grip
- Directional Ramped Logo Underside
- Package Dimensions: 19.2 H x 3.6 L x 11.9 W (centimeters)
- Package Weight: 0.142 kilograms
- Country of Origin : United States
Last update on 2025-08-26 / Affiliate links / Images from Amazon Product Advertising API
If you’re in search of a soft compound grip, the Gusset S2 Extra Soft is an outstanding choice. It utilizes a highly sticky VEXK3 compound, ensuring excellent performance in wet, cold, and various riding conditions.
The grip’s unique design places more rubber beneath your palm, providing additional cushioning. Moreover, the diamond ‘tread’ pattern is larger, contributing to increased damping. Additionally, the grip features ribs and a smaller file pattern, enhancing fingertip grip during bar manipulation.
Reasons to Buy
- Enhanced control in specific areas
- Exceptionally adhesive compound
- Affordable pricing
- Five color choices
Reasons to Avoid
- Likely to wear out quickly
- Limited cushioning
2. ODI Bjorn Grips
- Crafted from recycled TPE rubber
- One-sided lock-on design
- Round shape
- Length: 130mm
- Lock-on feature: Yes
Last update on 2025-08-26 / Affiliate links / Images from Amazon Product Advertising API
ODI and Bjorn Bikes have collaborated to create the ODI Bjorn Grips, which prioritized sustainability. These bike handlebar grips are made from 100 percent recycled offcuts sourced from ODI’s manufacturing facility in the United States.
Not only do these grips contribute to environmental conservation, but they also provide a remarkably soft, tacky, and dampened grip sensation. The blocked profile and increased material depth offer enhanced grip and minimize vibrations transmitted to the palms. Additionally, the thinner sections beneath the fingers deliver precise feedback.
While these grips excel in trail damping, they do come with a slight weight disadvantage. Furthermore, the larger 31mm grip diameter may not be suitable for individuals with smaller hands.
Reasons to Buy
- Exceptionally adhesive
- Effective shock absorption
- Environmentally friendly
Reasons to Avoid
- Soft rubber ends are prone to quick wear
- Possibility of slipping
3. PNW Loam Grips
- Diameter: Regular 30mm / XL 34mm, Weight: Regular 90g / XL 120g a pair, Width: 133.5mm
- Durometer: 25A Happy Camper Compound
- Clamp Style: Closed End, single clamp
- Lifetime Warranty
Last update on 2025-08-26 / Affiliate links / Images from Amazon Product Advertising API
The PNW Loam Grips provide a wide range of color options, allowing you to match them perfectly with your bike. These grips feature tapered sleeves, ensuring a secure fit once you lock them in place.
Additionally, they have a slight flair against the clamp for added stability. The ribbed tread design incorporates multiple chevrons on the inner side of the grips, while the outer side is ridged at an angle.
Constructed from the 25a Duro ‘Happy Camper’ ultra tacky compound, these grips deliver outstanding grip and stiction. Although they may feel relatively firm in hand compared to fully mushroom-style grips, they provide ample support during intense riding sessions. Moreover, they offer a satisfying level of feedback.
It’s important to note that the PNW Loam Grips while offering excellent features, have a tendency to tear easily. Additionally, their relatively firm feel might not suit riders who prefer a softer grip.
Reasons to Buy
- Exceptional grip in both wet and dry conditions
- Utilizes a super soft compound
- Provides rich feedback
- Available in nine different colors
- Offers good value for the price
Reasons to Avoid
- Relatively firm feel
- Prone to tearing easily
4. ODI Ruffian
- Legendary Ruffian Diamondized Pattern
- Optimal Feedback and Control
- SINGLE CLAMP - Version 2.1 Lock-On System
- Proprietary ODI Soft Compound Material
- Hand Friendly Soft Ends - Reinforced for Added Durability
Last update on 2025-08-26 / Affiliate links / Images from Amazon Product Advertising API
The ODI Ruffian is undeniably one of the most popular MTB grips available, frequently found on the handlebars of gravity riders. These lock-on grips feature a slim profile that accommodates a wide range of hand sizes.
Once securely fastened, they remain free of play for extended periods. The rubber surface incorporates light knurling and waffling on the underside to enhance traction.
ODI offers the Ruffian grip in both soft and hard rubber compounds. While the firm version may last longer, the soft compound is also durable and offers the advantage of immediate comfort, eliminating the need for a break-in period that could otherwise result in sore palms.
It is worth noting, however, that the design of the outer lockring may limit the comfortable gripping area, potentially affecting hand positioning for some riders.
Reasons to Buy
- The soft version provides immediate comfort without requiring a break-in period
Reasons to Avoid
- The outer lockring limits the comfortable gripping area
5. Ergon GE1 Evo
- Material: Aluminum forged and CNCed Clamp
- Use: Endur, Freeride, Dirt
- Size: One Size
Last update on 2025-08-26 / Affiliate links / Images from Amazon Product Advertising API
Compared to Ergon’s GP1 grips, the GE1 Evo features a noticeably less radical design. These bike handlebar grips are designed ergonomically to alleviate stress on the muscles used for gripping, thus reducing the occurrence of arm pumps. With a cut-out skeleton and a unique shape, the GE1 Evo grips provide a wide contact area for your hands.
According to Ergon, angling the outer portion of the grip is intended to serve as a gentle reminder to ride with your elbows out. While I am somewhat skeptical of this claim, it may take a few rides to find the ideal tilt for your preference. Once you achieve the optimal angle, these grips will provide a comfortable and pain-free experience, leaving your palms happy.
It is important to note that getting the grip angle just right can be challenging, requiring some trial and error. Additionally, the bar ends of the grips are prone to damage in the event of a crash.
Reasons to Buy
- The ergonomic shape can help reduce arm pump
- Utilizes a durable grip material
Reasons to Avoid
- Difficult to achieve the optimal angle
- Bar ends are susceptible to damage in the event of a crash
6. ESI Chunky
- Designed specifically for mountain bikes, the ESI Chunky MTB Grips provide superior control and comfort on your rides.
- Made with soft, durable silicone that absorbs shock and reduces hand fatigue during long rides.
- Features a larger diameter of 32mm and a length of 5-1/8" (130mm), at only 60g weight, providing a secure grip for any type of terrain.
- Easy to install with its slip-on design, no need for adhesives or clamps. Made to fit standard handlebars. Length can also be cut to customize the length according to your preference.
- Trusted by professional riders and tested in various conditions, these grips are perfect for both beginners and experienced mountain bikers.
Last update on 2025-08-26 / Affiliate links / Images from Amazon Product Advertising API
ESI, an Arizona-based brand, holds the distinction of being the first to introduce silicone foam grips, which has since inspired similar versions from other grip manufacturers. The ESI grip essentially consists of a lightweight silicone tube that excels in various aspects.
It provides ample vibration damping, durability, and superior grip even in wet conditions. ESI offers its grips in a range of shapes, although the Chunky version tends to be a preferred choice. With a slightly ovalized form, these grips provide 32mm of padding, striking a balance between damping, comfort, and precise control over the handlebars.
It is worth noting, however, that installing and removing ESI grips can be a challenging task that may lead to moments of frustration.
Reasons to Buy
- Simple yet effective design
- Lightweight construction
- Comfortable feel
- Reasonable price
Reasons to Avoid
- Installation and removal can be frustrating and challenging
7. Lizard Skins Oury Lock-On
- Weight: 120 grams
- Length: 130 mm
- Diameter: Medium (31.75 mm)
- Item package quantity: 1
Last update on 2025-08-26 / Affiliate links / Images from Amazon Product Advertising API
Featuring large, deep soft rubber lugs, the Oury Lock-On grips from Lizard Skins excel at dampening trail vibrations, much like seagulls devouring chips. The knobby blocks on the grip surface provide excellent adhesion, ensuring a secure hold on your hand without being overly squishy or causing hand fatigue.
These grips have a reasonably thick diameter, making them suitable for those with larger hands. Lizard Skins goes the extra mile by offering customization options, allowing you to select the style of bar ends, and collar color, and even engrave a personalized message into the grip colors.
Furthermore, the grips’ old-school aesthetic complements a wide range of bikes, from rigid single-speeds to long-travel chargers. It’s important to consider that the grip diameter may be too large for riders with smaller hands, potentially impacting comfort and control.
Reasons to Buy
- The grippy compound effectively absorbs trail vibrations.
- Customization options are available.
Reasons to Avoid
- The grip diameter may be too large for individuals with small hands.
To Wrap Up — Bike Handlebar Grips
Handlebar grips, despite their simplicity and affordability, hold significant importance as one of the essential components on your bike. They greatly impact your comfort and the bike’s overall handling. Using the wrong bike handlebar grips can negatively affect your steering, braking, and shifting performance.
So, when selecting grips, take into consideration factors such as the shape and size of your hand, whether you typically wear gloves while riding, the climate in which you cycle, and the type of cycling you engage in.
By considering these aspects, you can make an informed choice that caters to your specific needs and preferences. Hopefully, this guide will further assist you in making a more informed decision regarding your grip selection.
Bike Handlebar Grips — Frequently Asked Questions
How do I clean and maintain handlebar grips?
Handlebar grips can accumulate dirt, sweat, and grime over time. To clean them, remove the grips from the handlebars and wash them with mild soap and water. Use a soft brush or cloth to scrub away any dirt or residue.
Rinse thoroughly and allow them to air dry before reinstalling. Additionally, check the bike handlebar grips regularly for signs of wear and tear, and replace them if they become damaged or lose their grip.
Are handlebar grips interchangeable?
Yes, bike handlebar grips are generally interchangeable as long as they match the handlebar diameter. Most grips come in standard sizes (e.g., 22.2mm for mountain bikes, 31.8mm for road bikes).
However, some bike handlebar grips may have integrated locking mechanisms that are specific to certain models or brands, so it’s essential to check compatibility before purchasing.
Can I use bike handlebar grips with gloves?
Yes, bike handlebar grips can be used with gloves. In fact, gloves can provide additional comfort, grip, and protection while riding. Grips with textured or patterned surfaces can work well with gloves, ensuring a secure grip even in wet or sweaty conditions.
Are there any specialized bike handlebar grips for riders with hand conditions or disabilities?
Yes, there are specialized bike handlebar grips available for riders with hand conditions or disabilities. These grips may feature unique designs, extra padding, or ergonomic shapes to provide additional support and comfort.
It’s recommended to consult with a bike shop or a medical professional specializing in bike fitting for specific recommendations based on individual needs.
Related:


