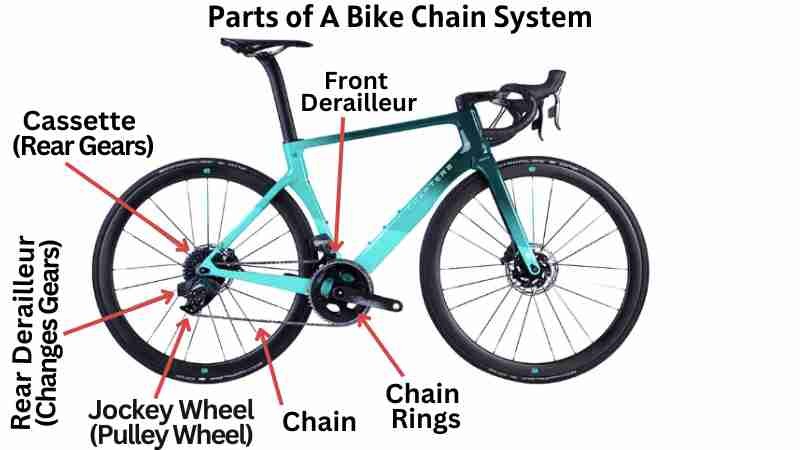
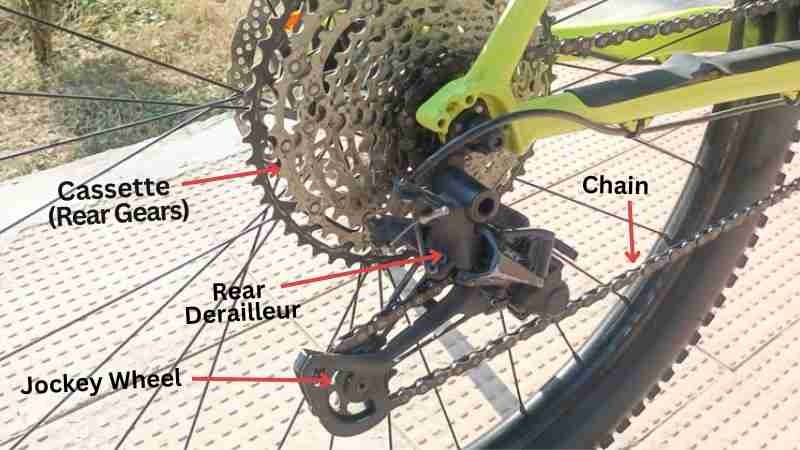
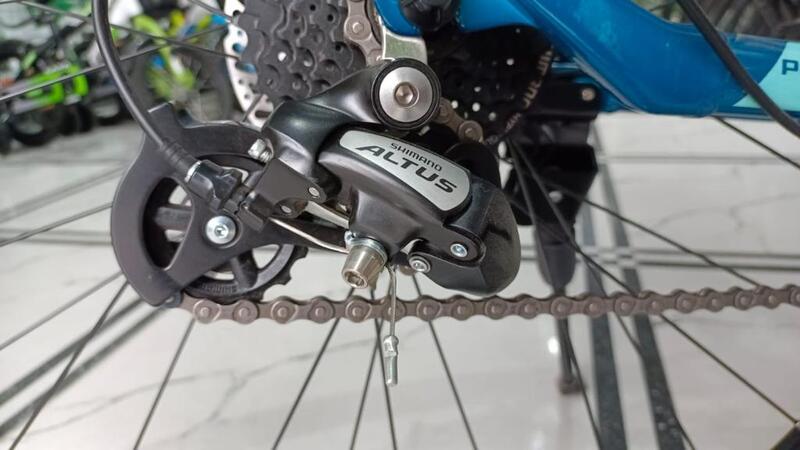
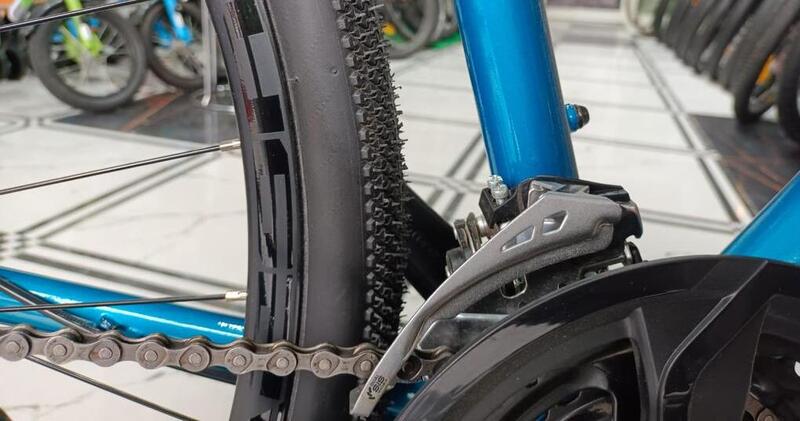
There are so many parts of a bicycle that many individuals don’t even try to learn the technical terms. Instead, they prefer pointing out the malfunctioning part. This is the ultimate reason they often have difficulty repairing bikes themselves.

The same applies to fixing a slipping bike chain issue. Many people get confused over terms and end up paying big money to the local bike shops for minor problems. This article is explicitly designed to help such people.
Hence, we will begin by understanding what a bike chain slipping and what causes issues in it. After understanding cores, we will move on to 100% guaranteed and proficient repair methods for fixing bike chain problems from the comfort of your home.
And the best part is that these techniques take you less than 10-30 minutes, depending on your bike issue. Looking forward to implementing these techniques to the test on your bike?
That’s great! Let’s begin, then.
What is Bike Chain Slipping
Often called a dropped chain, it refers to the chain falling from either the small (inside chainring), large (outside chainring), or crankset (front chainring). As a result, you are helpless and unable to pedal.

In cycling, a dropped chain majorly occurs when your chain does not fit properly in your gears. It can happen to either the front chain ring gear or the rear cassette gear.
Reasons for Slipping Bike Chain Issue
Chains can fall off due to a variety of factors. You need not be an experienced rider or a professional mechanic to fix this problem. A small guide below will be enough to get your bike ready for its next ride.
However, in this section, we will first examine the primary causes of slipping bike chains. As a result, we will have a better understanding of factors to keep in mind when it comes to preventing fall-offs in the first place.
1. Stiff Bike Chain Link
Bicycle stiff links are typically caused by compressing side plates too tightly, making the chain pin go under great force. Because of this problem, many chain companies provide master connecting links to join their chains.
To remove a stiff link, it is highly recommended that you use a chain tool and push on both ends of the pin that has caused the stiffness.
If you do this, the side plates will move away from each other, reducing the tightness.
You should make sure the pin is not pushed off-center since a protruding pin may cause chain skips or even chain failure.
How to Diagnose Stiff Link Issues in Your Bicycle Chain
If you’re having trouble finding a stiff link on your bike, kneel next to the drivetrain of your bike and slowly pedal backward by hand.
Observe how the chain passes over and between the derailleur pulleys. During the rotation of the pulleys, you will notice a stiff link.
2. Shifting Gears Hardly
Seven gears usually handle shifting on most bikes. A bike chain will come loose if you accidentally shift too hard, expecting an eight-gear.
In this case, your bike derailleur may overextend itself to fit your command. Try avoiding shifting hard for any chain slipping issues.
3. Dangling Screws & Bolts
A chainring that wobbles may also throw off the chain. Check all the chainring bolts with the appropriate wrench to ensure they’re tight. Once the bolts are tightened, check the chainrings to ensure they spin straight and true.
Watch the crank as you turn it by hand from above. It is recommended that you have the chainrings trued if there are wobbles (you need not replace the chainrings). A minor fixing will work.
4. Lengthened Bike Chain
Gear shifting is greatly improved by having the right chain length. There’s no doubt that setting chain length (and tension) correctly is not intuitive. However, it often solves front-shifting problems.
Test your bike by shifting the chain to the biggest chainring and the biggest cassette cog.
Next, push on the end of the derailleur cage (pushing forward) to see how much it moves. As long as it moves a little, you’re good.
A lot of movement indicates too much chain. There may not be enough chains if it’s really tight.
Chains that are too long (loose) may drop and/or shift unevenly. It is possible to have even more problems if your chain is too short (tight).
Things can go really bad … if the bike shifts and rips off the derailleur, damages the chain, or bends gear teeth.
How to Set Chain Length Accurately for Optimal Performance
1. A chain with fewer links means less moving mass that is less likely to get caught in or around objects. Conversely, make sure there is enough chain so that things don’t get tangled.
2. Having too much extra chain length can make things sloppy in the small cassette cogs and rings. The chain is taken up by rear derailleurs when shifting between larger and smaller cogs and between bigger and smaller chainrings.
The rear derailleur cannot handle enough slack if there is too much chain; and, at some point, the chain will droop, causing undesirable side effects.
3. Using the correct chain length will stay on the gear teeth even when cross-chaining (big ring to big cassette cog) is not accurate.
5. Too Much Lubrication
In your mind, a dry chain is the worst. There is a low squeal from the thing that begs for lube from anyone within earshot, so it’s got to be awful, right? It’s not as much as you might think. Despite not being ideal, dry chains are actually quite efficient.
By lubricating, you can overcome mechanical friction, prevent rust, and increase the life of your equipment.
However, too much lubrication can actually be harmful. A chain with extra lube attracts dirt and grime, causing your drivetrain to wear out faster.
Whenever possible, use a lube that is suitable to your riding conditions. Wet lube is recommended for riding on muddy, sloppy surfaces; dry lube is recommended for riding on arid terrain.
Keep your chain lubricated less often. Usually, a little squeak before a squeal indicates your chain needs to be lubricated. So, follow this way for lubrication.
6. Compatibility Issues
In spite of its rarity, there are still instances where a chain might be installed or placed incorrectly. When chains of the incorrect size are used, skips can occur.
Having two different-sized chains on your bike, or swapping one type of chain for another, can cause this problem.
Different cog sets for derailleur chains can have different numbers of sprockets, as well as different spacing between each link. You must choose the correct chain length and type to avoid loose or tight tension.
See the manufacturer’s installation instructions for your bicycle. By doing this, you can determine which part is incompatible and which is correct for your two-wheeler.
Otherwise, bringing your vehicle to a nearby bike shop for a professional inspection and proper replacement would be best.
7. Chain Not On Sprocket
If your gears don’t mesh properly, your bike may feel like it’s not working correctly.
A chain that does not fit on one sprocket will obviously not work, and if this happens over and over, either a shifter needs to be replaced, or a derailleur needs to be altered.
Note: The chain can also be wrapped around the brake cable and your derailleur if it slips off a sprocket.
How to Resolve a Skipped Bike Chain and Avoid Future Problems
1. Fine-Tune Cable Tension
You can fine-tune the position of the cable using the right barrel adjuster. Increasing tension on the cable by turning the derailleur adjuster anticlockwise closes the distance between the derailleur hanger and the wheel.
By turning clockwise, the tension decreases, bringing it back to the frame. You will need to increase the cable tension by turning the barrel adjuster anticlockwise if the chain seems hesitant to shift up.
If it skips over a gear, it is recommended that the tension be decreased by turning the adjustment knob clockwise. You will be able to tell when the drivetrain is set up correctly by listening to the noise it makes. Your goal is to make it run as quietly as possible.
2. Try Readjusting the Rear Derailleur

There may be an alignment issue with your rear derailleur arm if your chain isn’t moving or skip gears when you shift. Get off your bike and put your chain into the biggest chainring and smallest cog, then unfasten the cable clamp bolt (where the cable connects to the derailleur).
Derailleurs often have an H and L adjuster for high and low gears. Turn the high-gear screw until the jockey pulleys meet the smallest cog. Pedal turns must be smooth as the chain moves around the cogs and pulleys.
Push the rear derailleur forward while rotating the pedal forward to ensure the chain is aligned with the largest cog. In case the pulleys force the chain beyond the largest gear, screw the low adjuster inward until the chain stops moving.
Tighten the clamp after attaching the cable. Make fine adjustments to the rear derailleur barrel adjuster tensions on the cable housing. Ideally, the guide pulley should be positioned 6 to 7mm away from the cogs to achieve the best performance.
When shifting to a lower gear, adjust the barrel adjuster counterclockwise to prevent chain skip. Then clean the parallelogram linkage, add a few drops of lube to the pivot points go through a few shifts with the machine, then wipe off any extra lube with a damp cloth.
Note: Examine the rear wheel carefully to verify the alignment of the rear derailleur. The alignment must be observed closely to determine if it’s correct.
3. Precisely Settle the Front Derailleur

Adjust your front derailleur so that it sits over the outermost chainring. From the side, the derailleur cage, which is the long, curved part of the derailleur that passes through the chain, should be located approximately 2mm above the chainring teeth.
When viewed from above, the cage’s outer plate should coincide with the chainring. Loosen the derailleur mounting bolt to reposition your front derailleur. It is usually located on the opposite side of the seat tube from the derailleur body.
After you loosen the bolt, slide the derailleur up/down or rotate it slightly from side to side to reposition it.
Be sure to retighten the mounting bolt carefully before riding. In case, if the derailleur cage appears bent or damaged in any way, take it to a local bike shop for repair.
4. Change Overused Cogs
The chain will slip forward over the cog if the cogs are extremely worn (they won’t shift when you press the pedals). In fact, it can be a safety hazard since you may fall out of the saddle if your drivetrain suddenly gives way (similar to a broken chain case). Note that worn chains can lead to much rapid wear on other parts as well.
A well-maintained drivetrain rarely needs to replace chainrings or jockey wheels, but if the chain is too worn, it will grind into these, making a replacement much more costly.
It is common to have your cassette and chain replaced together once your chain is 1% longer than when the cassette was new. In this way, the chainrings and jockey wheels won’t be overworked.
5. Replace Rusty Old Shifting Cable
The first step to releasing cable tension is to shift your derailleur to the smallest sprocket on either the front or rear derailleur. Pay attention to how your cable is currently routed from your shift lever to your derailleur.
Cables that are misrouted can cause a variety of problems. Using a camera, you can take pictures of each section of the cable between the shifter and derailleur.
Despite the fact that your derailleur might not look exactly like the one you have taken a picture of, the concepts will be the same. Using the pinch bolt on the derailleur, disconnect the cable.
As a result of being pinched, the cable flattens out. Make sure you cut the cable just before this part so that it is easier to slide through the outer housing and remove it. You should replace the outer cable housings as well.
Install New Shifting Cable
After the lever and the cable are all that’s left, gently pull the cable until you see the head poking out. You can now pull it the rest of the way to remove it completely. Reinstalling the new cable can be tricky, depending on what kind of shifter cable you have. If the cable meets resistance, rotate it slightly and gently push until it slides all the way through.
The barrel adjuster on your shifter should be turned clockwise all the way and then backed off one full turn. Lubricate your cable housings with light oil and make sure the outer housing’s cable ferrules are firmly in place before carefully threading the new cable through.
Make sure the barrel adjuster on your derailleur is tightened completely before releasing it one full turn. The inner cable should be routed under the pinch bolt washer of the derailleur in the same manner as before.
It is common for derailleurs to have grooves where the cable should sit. Tighten the pinch bolt and pull the cable tight. Once tightened, the cable will flatten. Make sure bolts are tightened according to the manufacturer’s specifications. Plus, ensure that the derailleur is adjusted as needed.
The wire should be cut about 2 inches further along the cable once it has been installed and adjusted. Wire cutters or pliers can gently crimp on the cable end of your new cable. Keeping fraying at bay will be easier this way.
6. Consider Buying a New Shifter
As you ride enough, shifters can also wear out, and most can never be serviced again. In case of a broken shifter, you can face jerky gear changes and slippage of the chain.
Common signs of a bad and failing shifter include an indicator that doesn’t match the gear, and the vehicle doesn’t go into gear, turn off, or start in another gear.
Final Words
Keeping your chain in good condition requires regular inspection to prevent future problems. Mechanics can inspect your bike, but being able to do it yourself is an advantage.
Your next ride may not go according to plan, so you need to know how to fix a slipped bike chain.
Hopefully, this article will provide you with some help in the event you run into that problem.
Else, if you have any suggestions or doubts, feel free to drop a comment below. I will be more than happy to assist you with your query. Please follow our Facebook Page for more guides like this.
Frequently Asked Questions
Why does my chain skip when I pedal hard?
This includes worn-out or misaligned derailleur pulleys, old or malfunctioning switchers, removing gears, and breaking/bagging teeth on some cassette cylinders. The accumulation of dirt in other drivetrain components also causes shifting problems – this may be a result of removing the chains.
Why is my new chain slipping?
The majority of the time, it happens due to broken cables. This new swiveling cable is quite wide during the first few rides. The cables stretch far too much over time and when problems arise, your chain slips between gears.
How do I fix my bike chain slack?
Loosen rear axle. Make sure the chains are not too tightly attached, then adjust the rear wheels. It is easy to tighten a bicycle chain in Florida to make a multi-chain bike.
Can you reattach a bike chain?
The links of a chain are held together by steel pins or pegs. The chain tool (or a hammer) allows you to remove or attach links by pushing out and pushing in the pins.
Is a bike chain easy to fix?
A bike chain rarely needs to be repaired or changed unless you do a lot of mountain biking. However, chains do break occasionally. If you are prepared, you can fix one on the street no differently than if you had a flat tire. All you need is a chain tool to fix a broken chain. They can be found in a variety of common multi-tools and are compact.
Related:
